Helldivers 2 Armor Tier List: Best Armor by Mission and Role
Quick answer: medium armor is the safest all-round tier, light armor is usually best for objective speed and stealth, and heavy armor wins when explosive pressure or sustained fire matters. The best Helldivers 2 armor tier list is therefore a decision guide, not one permanent winner. Use the ranking below, then confirm the current armor rating, movement stats, and passive in the live Armory.

The quick verdict
Start with medium armor if you want one set that survives ordinary mistakes without making every objective feel slow. Choose light armor when the mission rewards movement, sample routes, stealth, or fast terminal work. Choose heavy armor when your team must hold ground under explosions, rockets, or repeated fire. A passive can move a set up or down one tier: Fortified and explosive resistance are valuable under blast pressure, while Scout, Feet First, and Reduced Signature are stronger when the team can avoid direct fights. This ranking describes practical fit; it does not claim that every patch or every faction has the same answer.
How this armor tier list is scored
Each tier weighs five things: the protection you get from the class, the mobility cost, the passive's repeatable value, the number of missions where the set makes sense, and the risk that a balance patch changes its value. A set reaches S tier when it solves a common failure without creating a new problem. A specialist resistance can still be the best choice for one mission, but it sits lower in a general list because it is less reliable across unknown hazards. Community descriptions are useful for discovery, while the current in-game description and official patch notes remain the final check.
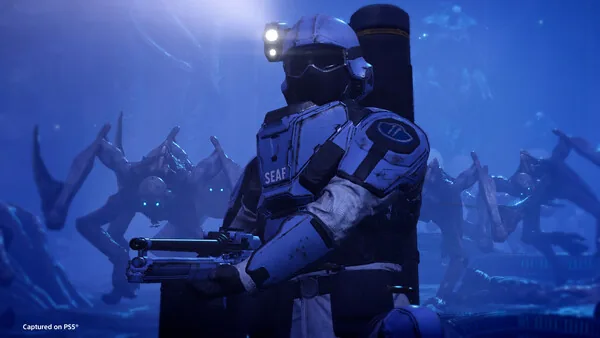
Light, medium, or heavy: which class fits you?
Light armor is a tempo choice. It helps you rotate between objectives, pick up samples, break line of sight, and reach terminals before patrol pressure grows. Medium armor is the default for players who want room for mistakes and still need acceptable movement. Heavy armor is a commitment to staying in the fight: it is strongest when a squad can create cover, focus fire, and let the wearer anchor a lane. Do not select only by the armor number. Compare sprint feel, stamina, passive, weapon handling, and the actual distance your mission route demands.
Best armor tiers by mission pressure
Against explosive threats, Fortified or a Concussive Padding variant is usually a better starting point than a generic high rating. Against fire, gas, acid, or arc damage, match the resistance to the threat shown by the current mission rather than assuming a faction always needs one passive. For stealth and sample runs, Scout, Reduced Signature, or Feet First can outperform a slower defensive set because avoiding a patrol saves more health than an extra hit can provide. For long firefights, Med-Kit, Democracy Protects, Siege-Ready, or True Grit are worth comparing with your weapon and resupply plan.
Helldivers 2 armor tier list by role
Use the tier as a starting point. The current mission hazard and the rest of your loadout can move a specialist choice above a general S-tier set.
| Tier | Armor and passive fit | Best use | Main trade-off |
|---|---|---|---|
| S | Medium + Fortified / Engineering Kit | Best all-round starting point | You lose some speed compared with light armor; match the passive to the mission. |
| S | Light + Scout / Feet First | Objective routes, samples, stealth | Lower armor rating punishes mistakes in direct fights. |
| A | Heavy + Fortified / Extra Padding | Explosive pressure and holding ground | Slow movement can cost time and make repositioning harder. |
| A | Medium + Med-Kit / Democracy Protects | Long fights and recovery windows | The passive helps only when you actually use stims or take repeated hits. |
| B | Any class + Inflammable / Acclimated | Fire, gas, acid, or mixed hazards | Specialized resistance is weak when the mission deals a different damage type. |
| B | Heavy or medium + Siege-Ready / Unflinching | Sustained fire and recoil control | A weapon-focused passive cannot replace the right armor class or movement speed. |
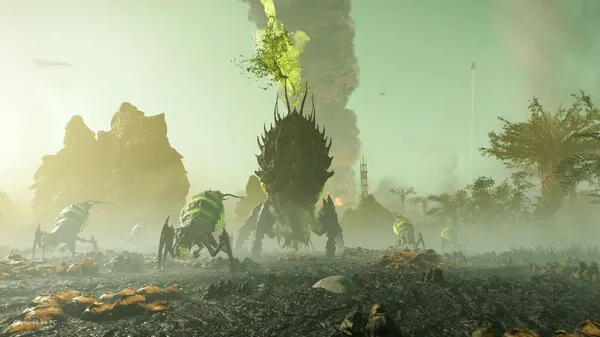
Why passive names and armor class must be read together
The same passive can feel different on a light, medium, or heavy body. A stealth passive on light armor supports route planning; the same idea on heavy armor may still leave you too slow to exploit it. Likewise, recoil or reload help is most useful when your primary or support weapon actually depends on sustained fire. The existing armor passive reference on this site is the lookup page for individual effects. This tier list adds the missing decision layer: which class and passive combination is sensible before a mission, and when a specialist option should override the general ranking.
A practical pre-drop method
First name the mission failure you are trying to remove: deaths from explosions, slow objective rotations, empty magazines, or patrols catching the squad. Next choose a class that addresses the failure, then choose a passive that reinforces it. Finally check the rest of the loadout. A heavy armor choice may need a mobility or support stratagem; a light armor choice may need crowd control that keeps enemies away; a recoil passive may require a weapon that rewards crouched fire. This three-step check prevents a tier list from turning into an automatic purchase or a rigid faction rule.
Common mistakes
The most common mistake is treating armor tier as a universal power ranking. A second is comparing screenshots or old wiki text without checking the current client. A third is choosing a passive because its percentage looks large while ignoring whether the mission deals that damage type. Finally, do not confuse armor body effects with helmet or cape cosmetics. When a patch changes a weapon, enemy, or passive, revisit the ranking from the mission problem outward rather than copying an old S-tier label.
Update note and limits
This page is an independent fan reference checked on October 30, 2026. The gameplay images are official Steam gallery screenshots; they illustrate context, not proof of a particular stat. Armor names, availability, prices, and passive values can change with Warbond releases, Superstore rotations, and balance patches. Verify the live Armory and official patch notes before spending Medals or planning a high-difficulty operation.
Four checks before you lock the armor
- Read the current armor class, rating, movement, and passive in the live Armory.
- Name the mission failure the armor is meant to solve.
- Match the passive to the damage type or resource your loadout actually uses.
- Recheck official patch notes when a recommendation depends on a percentage or a newly released set.
Check every armor passive Build a complete loadout Compare weapon roles Browse Warbonds
Helldivers 2 armor tier list FAQ
What is the best armor in Helldivers 2?
Medium armor is the safest general starting point, but light armor can be better for speed and stealth while heavy armor can be better under explosive pressure. The passive and mission hazard decide the final choice.
Is light, medium, or heavy armor best for beginners?
Medium armor is usually easiest to learn because it gives protection without the full movement cost of heavy armor. Beginners should still try light armor for objective missions and heavy armor when survivability is the main problem.
What is the best armor for bugs or Automatons?
Do not choose only by faction. Bugs can create melee, acid, and fire pressure, while Automatons can create rockets and sustained fire. Read the current mission hazards and choose the matching passive.
Does armor class determine the passive?
No. Class controls the broad protection and movement trade-off; the passive is a separate property and can appear on more than one class.
Should I follow an armor tier list after a patch?
Use it as a starting point, then confirm the live item description and patch notes. A new enemy, weapon balance change, or resistance update can make a specialist set more useful than its old tier suggests.
Where can I check individual armor passives?
Use the site's Helldivers 2 armor passives reference for the effect catalog, then return here to decide which class and passive combination fits the mission.
Are the screenshots on this page official armor screenshots?
They are official Steam gallery gameplay screenshots used for context. They are not armor-menu captures and do not prove a particular passive value.
Sources and verification notes
- Steam store: HELLDIVERS 2 - Official game listing and gallery used for the three contextual screenshots.
- Helldivers Wiki: Armor - Community-maintained armor class and item reference; verify current values in game.
- Helldivers Wiki: Armor Passive - Community index used to cross-check passive names; it is not a substitute for live patch notes.
- PlayStation Blog: Helldivers 2 - Official example of a new armor passive announcement and why release notes matter.